










Table of Contents
For a typical 200 L (53 gal) tub starting near 20–25°C (68–77°F), a practical first-cool planning range is about 2–8 hours when the chiller is properly matched and the ambient temperature is close to 22°C (72°F). Larger tubs, warmer fill water, hot outdoor air, direct sun, or weak insulation can extend the job beyond that range.
Quick Summary
Plan about 2–8 hours for the first cool-down of a typical 200 L tub. This reference assumes roughly 20–25°C starting water, a target near 2–3°C, and 22°C ambient air; actual time depends on chiller capacity and installation conditions.
Water volume and temperature drop create the basic workload. Hot air, sun, an open lid, and weak insulation add more heat while the chiller runs.
Your own timed test is the best answer. Record the starting temperature and measure the water at fixed intervals under normal operating conditions.
Slow does not always mean faulty. Check the filter, water flow, hose routing, condenser airflow, and installation conditions before assuming the refrigeration system has failed.
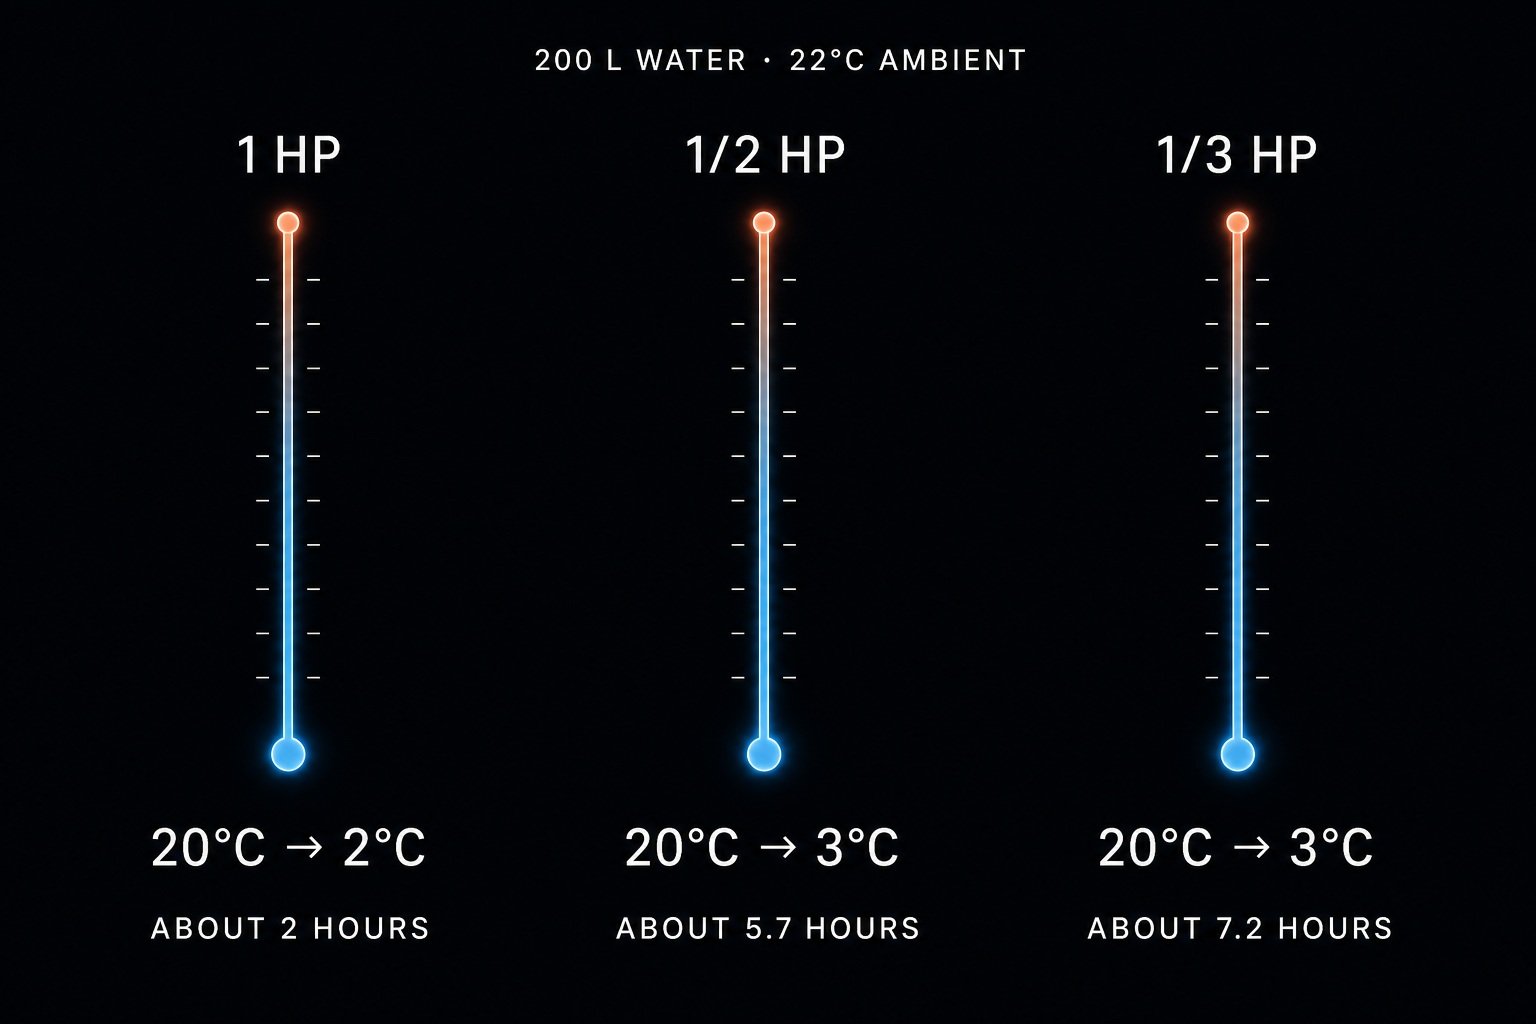
Typical Cold Plunge Cooling Times
For a 200 L (53 gal) tub in moderate indoor conditions, 2–8 hours is a useful first-cool reference. The faster end requires more cooling capacity; a compact chiller may need most of a working day to remove the same amount of heat.FOCEEDO’s cooling-time reference shows how chiller capacity changes the result. The following tests used 200 L (53 gal) of water at 22°C (72°F) ambient temperature:| FOCEEDO Model | Starting Temperature | Target Temperature | Reference Cooling Time |
|---|---|---|---|
| E10 | 20°C / 68°F | 2°C / 35.6°F | About 2 hours |
| E05 | 20°C / 68°F | 3°C / 37.4°F | About 5.7 hours |
| E03 | 20°C / 68°F | 3°C / 37.4°F | About 7.2 hours |
First Cool-Down: About 2–8 Hours for 200 L
The first cool-down begins with fresh water and ends when the full tub reaches its target. For a matched 200 L setup near the conditions above, plan around 2–8 hours; if the starting water is much warmer or the tub is larger, plan for more time.For example, cooling water from 75°F to 50°F requires a 25°F drop. Starting at 60°F and reaching the same target requires only a 10°F drop, so the same equipment should finish sooner under otherwise similar conditions.Keeping Cold Water at Its Set Temperature
Once the water is cold, the chiller is no longer repeating the first pull-down. It switches on as needed to offset heat entering through the tub, cover, hoses, surrounding air, circulation equipment, and normal use.A covered and insulated system may need only periodic cooling cycles to stay near the setpoint. An uncovered outdoor tub can gain heat so quickly that the compressor runs much longer, even though the water was already cold at the start of the day.Cooling the Water Again After Use
Recovery time starts after a user, an open lid, or added water raises the temperature. This is often more important than first pull-down time for a gym, spa, hotel, or recovery studio because the system must recover repeatedly instead of cooling one untouched tub.A commercial operator therefore needs two answers: how long the first morning cool-down takes and whether the water can return to the operating setpoint before the next booking.How to Estimate Your Cooling Time
You do not need a long thermodynamics lesson to make a useful first estimate. Start with the temperature drop, confirm the real amount of water, and compare your installation with the conditions behind any supplier claim.
Measure the Temperature Drop
Subtract the target temperature from the starting temperature:
A larger drop means more heat must leave the water. When comparing two cooling claims, look at the full temperature change rather than the target temperature alone.
Cooling from 70°F to 50°F is not the same job as cooling from 60°F to 50°F. The first test requires twice the temperature change for the same water volume.
Check the Water Volume
Use the amount of water actually inside the operating system, not only the tub’s advertised maximum capacity. The working volume is usually lower because the user needs displacement space, although external hoses and equipment may add a small amount.
A measured fill is more reliable than a rough guess from the tub’s outer dimensions. You can use a hose flow meter, known container size, or timed fill rate to establish the normal operating volume.
Compare Real Conditions
A meaningful supplier test should identify the water volume, starting and target temperatures, ambient temperature, cover status, and basic flow conditions. If those details are missing, treat the advertised cool-down time as a rough reference rather than a transferable result.
Suppose your own setup drops 12°F in 3 hours during a controlled test. Its observed average for that period is 4°F per hour, so another 8°F may require at least two more hours under similar conditions. The final part can take longer if the surrounding air is hot or the target approaches the system’s lower operating limit, so use the calculation as a schedule estimate, not a permanent specification.
What Makes Cooling Faster or Slower?
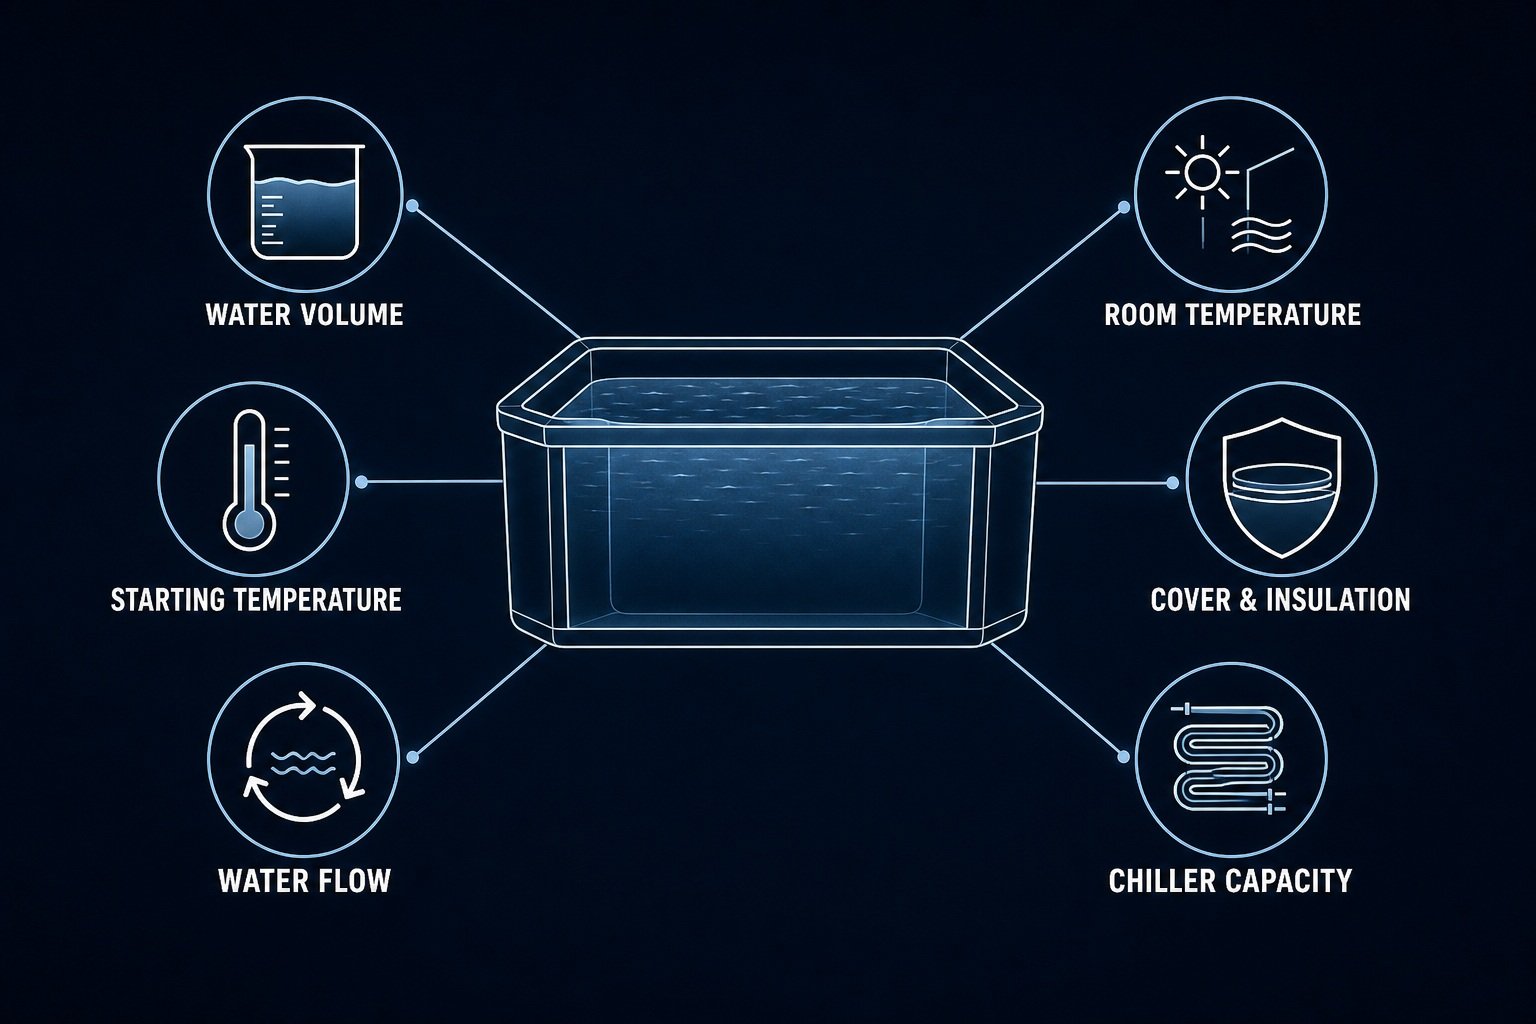
Nearly every cooling-time difference comes from one of three places: the amount of heat stored in the water, heat continually entering the setup, or the system’s ability to move that heat out. This is a clearer way to diagnose performance than treating every variable as a separate problem.
Water Volume and Starting Temperature
More water takes longer to cool when the chiller and all other conditions remain the same. A result measured with 60 gallons should not be copied directly to a 100-gallon installation.
The starting temperature matters just as much. Fresh tap water may be much warmer in summer than in winter, so the same tub and chiller can produce different cool-down times across the year without any equipment fault.
Room Temperature, Sun, and Insulation
Warm air, direct sun, an open cover, and weak insulation keep adding heat while the chiller is trying to remove it. Exposed hoses can also gain heat when they run across a warm floor or outdoor surface.
The cover often makes the most immediate difference because it reduces heat exchange at the open water surface. Shade and tub insulation also help, but they must not block the chiller’s air intake or exhaust.
Chiller Capacity and Water Flow
Cooling capacity determines how much heat the equipment can remove under stated conditions. A horsepower label alone cannot predict the result because systems with the same HP description may use different compressors, heat exchangers, controls, fans, and rating methods.
Water flow carries heat from the tub to the chiller. A dirty filter, trapped air, folded hose, partly closed valve, or unsuitable pump can reduce heat transfer or trigger low-flow protection, while an air-cooled condenser loses performance when hot exhaust air is pulled back into its intake.
More flow is not automatically better. The pump and hose arrangement must stay within the range allowed for the exact chiller, so do not install a larger pump or bypass a protective flow switch simply to chase a faster number.
How to Test Your Cooling Time
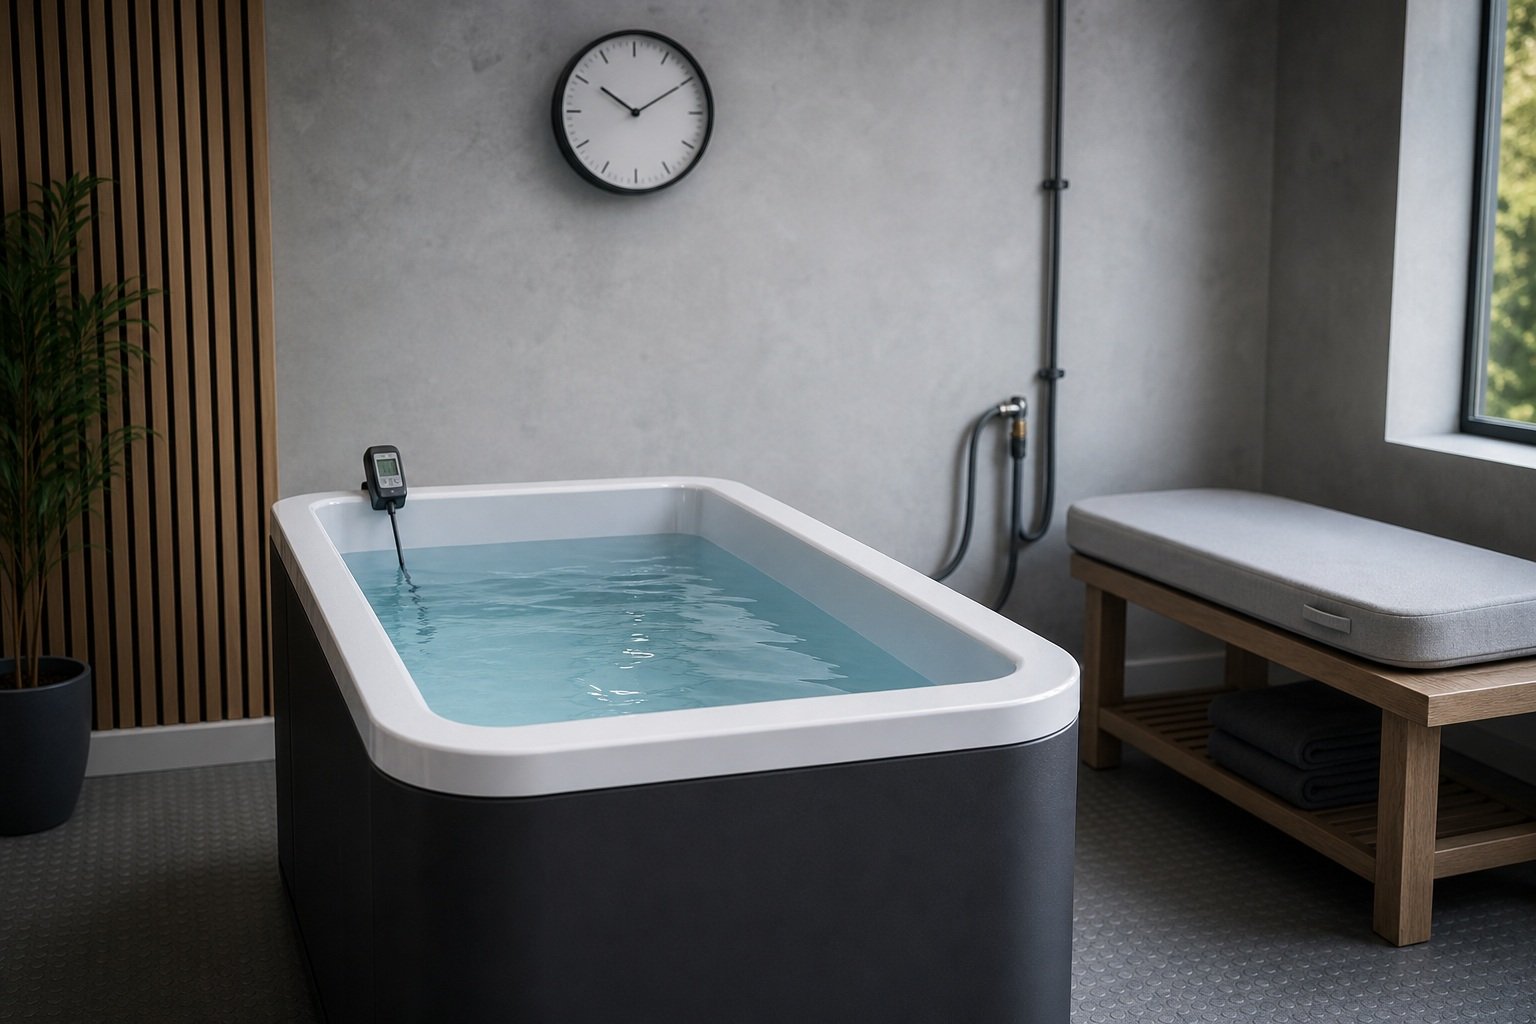
A controlled pull-down test gives you a practical answer for the actual tub, chiller, plumbing, and climate. It also creates a baseline that makes later performance changes easier to spot.
Record the Conditions
Start with a clean, normally operating system. Confirm the working water level, close the cover, clean the filter, remove visible hose restrictions, prime the loop correctly, and leave the required ventilation space around the chiller.
Record the following before cooling begins:
- Actual water volume
- Starting and target temperatures
- Ambient temperature
- Indoor, shaded outdoor, or direct-sun location
- Cover open or closed
- Filter condition
- Pump setting or verified flow, if available
- Date and start time
Measure at Fixed Intervals
Use an independent thermometer to check the controller reading during the first test. Measure in the same part of the tub each time and avoid placing the probe directly beside the cold-water return, where the reading may be lower than the bulk water temperature.
Record the result every 30 or 60 minutes without using the tub or adding water:
| Time | Water Temperature | Ambient Temperature | Cover | Notes |
|---|---|---|---|---|
| Start | — | — | Closed | Initial conditions |
| +1 hour | — | — | Closed | Check flow and airflow |
| +2 hours | — | — | Closed | Note any interruption |
| Target reached | — | — | Closed | Record total time |
Use the Result as Your Baseline
The total elapsed time is the most useful planning number for that installation under those conditions. Keep the test record so you can compare it with hotter weather, a different water volume, or a later performance check.
Do not assume a slower result is automatically a fault if the new test starts with warmer water or runs in hotter air. Compare like with like: similar volume, temperature drop, cover position, flow condition, and ambient temperature.
Repeat After a Change
Repeat the test after making one meaningful change, such as adding a fitted cover, moving the tub into shade, insulating exposed water lines, or cleaning a restricted filter. Changing one item at a time shows whether it genuinely improved the result.
For a commercial installation, also run a recovery test during a realistic booking period. A quiet first pull-down does not show how the system handles repeated users.
Make Cooling Faster
The safest improvements either prevent heat from entering the water or restore the water and air movement the equipment was designed to use. Start with the simple checks before considering a larger chiller.
- Close the cover. Keep a fitted, insulated cover closed during the first pull-down and whenever the tub is unused.
- Reduce direct sun. Place the tub in shade where practical, especially during the hottest part of the day.
- Improve insulation. Insulate the tub and exposed water lines with materials suitable for the installation environment.
- Clean the filter. Follow the maintenance interval and replace a damaged or permanently clogged element.
- Restore normal water flow. Straighten folded hoses, confirm valve positions, and remove trapped air through the approved priming procedure.
- Protect condenser airflow. Keep the chiller’s intake and exhaust clear so hot discharge air does not recirculate.
- Start earlier. Use the measured pull-down time to schedule cooling before the planned session or opening time.
Do not wrap insulation around the chiller cabinet or place the unit inside a poorly ventilated enclosure. The tub and hoses benefit from insulation, but an air-cooled condenser needs open airflow to release heat.
Avoid repeated breaker resets, bypassed flow switches, unauthorized refrigerant work, or operation with a burning smell. Adding ice may shorten the water cool-down, but only do so when the tub, pump, filter, water-care method, and manufacturer instructions allow it.
Is Slow Cooling a Problem?
Slow cooling can be normal when the system starts with warm water, handles a large volume, works in hot weather, or approaches a low target temperature. The key question is whether the temperature continues to fall and whether the result remains close to your established baseline under similar conditions.
| What You See | What It May Mean | What to Do |
|---|---|---|
| Temperature falls steadily but slowly | Large water load, large temperature drop, hot weather, or weak insulation | Continue monitoring; close the cover and reduce avoidable heat gain |
| Temperature barely changes | Restricted flow, dirty filter, trapped air, poor condenser ventilation, or a measurement issue | Check the filter, return flow, hoses, valves, airflow, and an independent thermometer |
| Performance is much slower than an earlier comparable test | Changed conditions, reduced flow, blocked airflow, or equipment degradation | Restore normal conditions and repeat the controlled test |
| The chiller stops before reaching the setpoint | Low-flow protection, high-temperature protection, control error, or another system fault | Record the error, stop repeated resets, and follow the model manual |
| Ice appears inside hoses or equipment | Abnormal flow, an excessively low setting, or a control problem | Stop operation and contact qualified technical support |
| Breakers trip, electrical parts become hot, water reaches damaged wiring, or there is a burning smell | Electrical or mechanical safety problem | Disconnect power safely and stop using the system |
A steady temperature drop usually shows that cooling is still taking place, even if the result is slower than expected. A flat temperature line, weak return flow, repeated errors, or a sudden change from the established baseline deserves closer attention.
If normal water flow and condenser airflow have been restored but performance remains far below the documented baseline, contact qualified support. Refrigerant, compressor, internal electrical, and sealed-system work are not user adjustments.
Cooling Time for Gyms, Spas, and Hotels
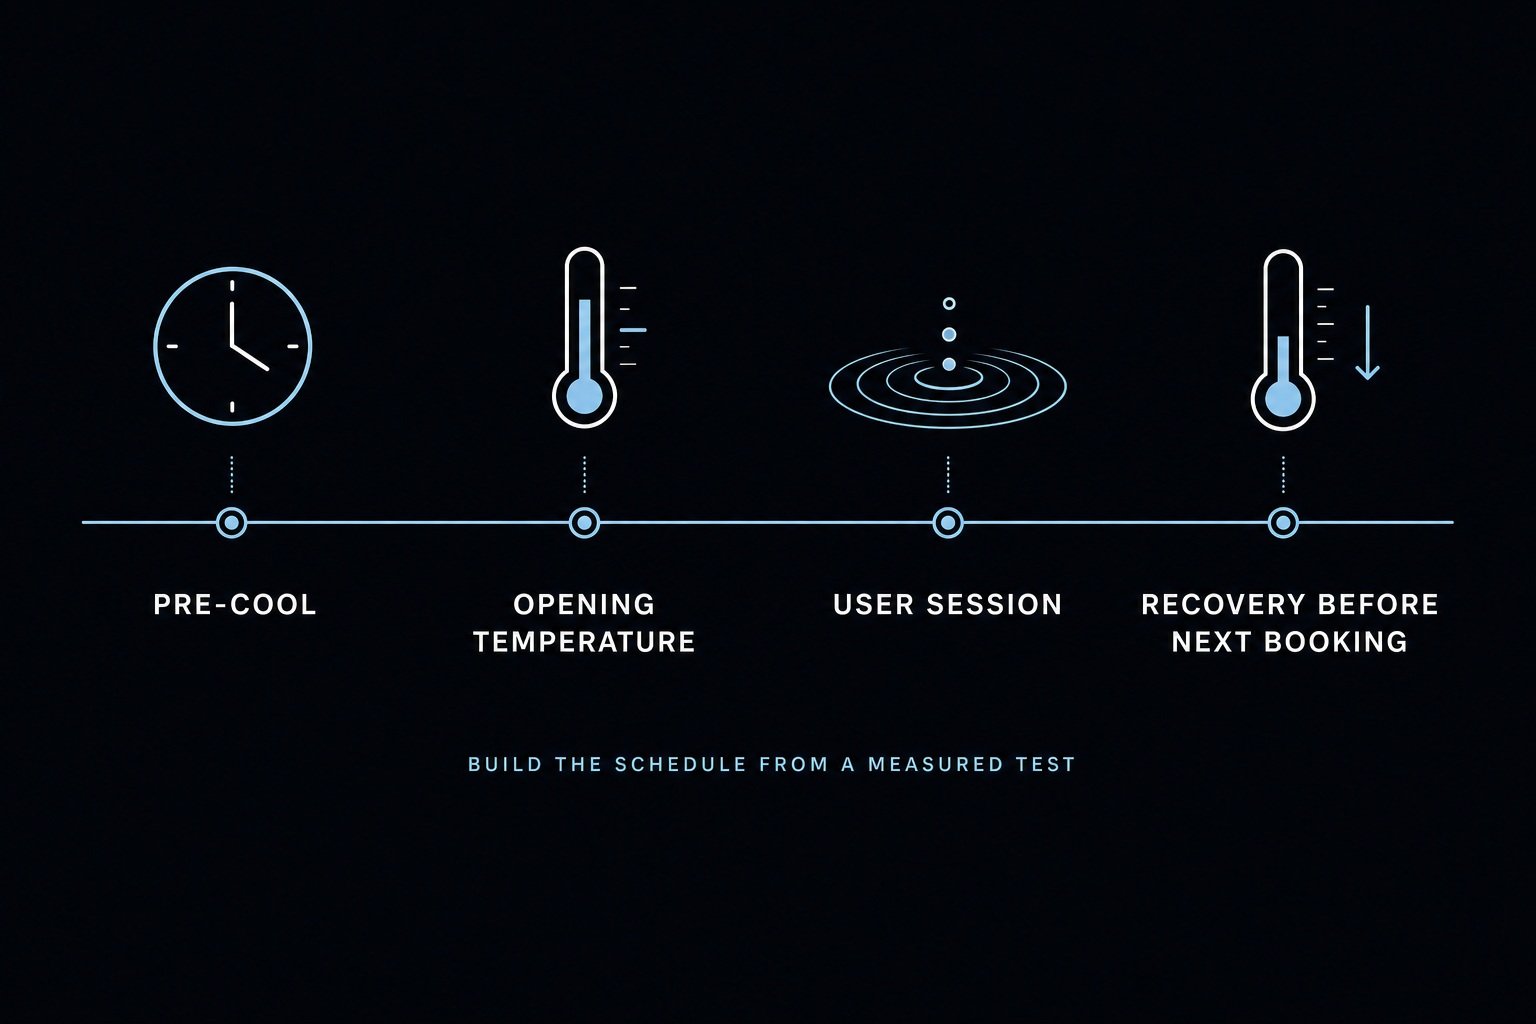
A gym, spa, hotel, or recovery studio should plan around operating load rather than one headline cool-down time. The useful questions are when the water reaches the opening temperature, how much it warms during use, and whether it recovers before the next booking.
Pre-Cool Before Opening
Run a pull-down test at the normal commercial water volume, then work backward from the opening time. Add a reasonable buffer instead of scheduling the first session for the exact minute reached in the best test.
Repeat the test during the hottest expected season if the tub is outdoors or installed in a warm room. A schedule based only on mild-weather performance may not leave enough time during peak summer conditions.
Measure Recovery Between Users
Record the water temperature immediately before and after each session during a realistic busy period. Note the number of users, session spacing, lid position, ambient temperature, and any added water.
The most useful recovery measure is whether the tub returns to its setpoint before the next planned user. If it does not, the operator may need longer booking gaps, better insulation, a smaller working water volume where appropriate, or more cooling capacity.
Size for the Busy Period
Compare equipment using documented operating conditions, not horsepower labels or isolated “degrees per hour” claims. Ask suppliers for the tested water volume, starting and target temperatures, ambient temperature, cover status, flow conditions, total pull-down time, and recovery data when repeated use matters.
A first-fill test shows only one part of the job. Commercial sizing should reflect the busiest realistic period, because repeated users, open-lid time, top-up water, and seasonal heat can create a much higher operating load than an untouched morning tub.
The clearest answer to how long a cold plunge chiller takes to cool water is therefore a measured one. Plan several hours for the first pull-down, control the heat entering the setup, and record one complete test under normal conditions; that baseline will help you schedule sessions accurately.
Related Articles
FOCEEDO Partners with Nordu Spa in Türkiye
FOCEEDO and Nordu Spa begin a distribution partnership in Türkiye, adding FOCEEDO ice bath chillers to Nordu Spa’s cold-plunge range.
Meet FOCEEDO at AusFitness Industry 2026
Meet FOCEEDO at Stand 116 during AusFitness Industry, 11–12 September 2026 at ICC Sydney, and discuss cold recovery and partnerships.
Ice Bath Chiller Maintenance Guide for Commercial Facilities
Use this commercial ice bath chiller maintenance guide to build daily, weekly, and periodic checks for flow, filters, leaks, airflow, and water care.